Tuesday, July 20, 2010

Today's Dinner: Failure Alert!

Lucy Waverman is a bit of a contradictory enigma to me. She's an Ontario chef who's both the food editor for the LCBO's Food and Drink magazine, from which we get a lot of good recipes, as well as several cook books at this point. Unfortunately at this point, none of her cook books have been "good enough" to own or even remotely related to our culinary point of view. On the other hand, her homemade macaroni and cheese recipe is one of our favourites. Her newest cookbook, A Year in Lucy's kitchen, is based on a great idea and has solid formatting, but doesn't present recipes that are truly accessible for all chefs. We still managed to find a few recipes that we liked though, and kept in mind how successful her mac and cheese recipe turned out to be.

Unfortunately, things didn't go nearly as well with the first attempt tonight. Mushrooms in Spicy Sauce was touted to be a tasty starter or vegetarian main course, so that's how we tried it.

Mushrooms in Spicy Sauce

4 anchovy fillets (not sure how its vegetarian with anchovy in it...)
2 tsp garlic
1 tsp smoked paprika
1 cup parsley, packed
1/3 cup olive oil
2 tbsp water
1 lb king oyster or mixed mushrooms
Salt and Ground Pepper
4 slices Portuguese cornbread or Sourdough loaf, toasted

Salad

6 cups packed baby arugula or mesclun mix
1 tsp balsamic vinegar
1 tbsp olive oil
Maldon Salt

1. Place anchovies, garlic, paprika, parsley and 1/4 cup oil in a food process and pulse to combine. Add water if needed and process until mixture resembles pesto. Set aside.

2. Heat a large skillet over high heat, adding remaining oil. Add mushrooms and saute for 3-5 minutes or until mushrooms are golden and limp.

3. Reduce heat to medium-low and stir in pesto mixture. Cook together until hot. Remove from heat and season with salt and pepper.

4. Place toast slices on individual serving plates. Brush with a little sauce from skillet. Heap mushroom mixture on top.

5. Toss arugula with vinegar and oil in a bowl. Surround toasts with salad. Sprinkle with Maldon salt.


Reflections: Well, our first issue was that I've never heard of KING oyster mushrooms before, never mind seen them anywhere for purchase. I picked this recipe out when we found another nice batch of wild chanterelles, and used them with a mix of crimini and oyster mushrooms. I threw some enoki mushrooms in the salad for balance as well. Not sure what happened with my pesto mixture, but something was DEFINITELY wrong. I could have added too much parsley since I just free handed it, or it could have been something else. There definitely wasn't any "red sauce" to brush the toast with, that's for sure. Things were seriously overpowered by the anchovies, which aren't exactly my favourite ingredient to start with. My wife had some "gourmet anchovies" in the fridge so I used those; maybe I should have cut down on the amount. Otherwise I'm really not sure what went wrong. When I try this recipe again, it'll be withOUT the anchovies...

Experimentation: Magical Breakfast Cream

It's probably an open secret, but sadly the Apothecary's Gardner enjoys his food just a little too much sometimes. For that reason, among others, he's usually looking for tasty ways to eat healthier and even lose some weight. One of the more interesting ways that I've come across to do this lately has been a recipe for "Magical Breakfast Cream" from the French Women Don't Get Fat Cookbook. Apparently it's supposed to be a filling and healthy breakfast that will lead to anywhere from 3-10 lost pounds over time. As someone who's also looking for a decent and easy breakfast to make, especially during the school year, I figure I'd try it out!

Magical Breakfast Cream

4-6 tbs yogurt (about 1/2 cup)
1 tsp flax oil
1-2 tbs lemon juice (preferably Meyer)
1 tsp honey (preferably local)
2 tbs finely ground cereal (with no sugar added, like Shredded Wheat)
2 tsp finely ground walnuts (err...pecans in my case)

1. Put yogurt in a bowl and add the flax oil (major omega 3 source and flavourless). Mix well. Add the lemon juice and mix well. Add the honey and mix well. (It's important to add each ingredient separately and mix well to keep the mixture smooth and homogeneous.)

2. Finely grind the cereal and walnuts, if you haven't done the the night before. (Easy to grind enough of each on the weekend and store in the fridge for easy preparation.)

3. Add the cereal and nuts to the yogurt mixture and mix well.

One of the best things about this recipe is that it's immanently customizable. You can play with the nuts, the cereal (as long as there's no sugar added - good luck with that, by the way!) or even the citrus juice. It's easy enough to add fruit or berries to it as well and maintain how healthy it is.

First Day Thoughts: Tried it today with pecans instead of walnuts (my wife is allergic) and Shredded Wheat with Bran cereal. It was tangy and smooth and mostly tasted of the cereal. I only had regular lemon juice to use, but found (for the first time ever) some Meyer lemons today at the market, so I'll probably zest and juice one for tomorrow's version. I'm curious to see what Scottish oatmeal would be like in this recipe too...

BBQ Season!!! Part 1

Well, my BBQ season got started later than most due to a (still) malfunctioning barbecue, but unfortunately these things can't be helped. Hopefully mine is back to full strength quickly, and I can go back to experimenting with open fire and all that smokey goodness like chefs were meant to way way WAY back when! :p The one meal that I DID manage to prepare so far this year was probably my quintessential BBQ meal - cheeseburgers and corn on the cob. I'll explore the concept of the hamburger in the second part of this post, but I wanted to go over my "unique" corn on the cob on the BBQ recipe first.

I tend to get my recipes from a myriad of different places, as I imagine most chefs do. While some of them do come from family recipes, it's actually rare that I take anything from my mother or father's cooking, with this being a notable exception. You can say that the flavour of the grill adds to anything that you can barbecue, but I don't think that's more true with anything than corn on the cob. This is how my father made it as I grew up, and how I've continued to make it since I took over BBQ-ing duties in my teenager years. Just remember NOT TO HUSK THE CORN!!! :p

BBQ Corn on the Cob

Corn on the cob, STILL IN HUSK
Butter
Salt

1. Place all of the corn in the sink, STILL IN HUSK, and cover with cold water. Cobs will probably need to be weighted down. Leave submerged for 20 minutes, allowing the BBQ to warm up while they are soaking.

2. Place corn in BBQ (in the coals or on the grill as per the BBQ) STILL IN HUSK. Leave for 5 minutes with lid closed.

3. After 5 minutes, rotate corn by 1/4 turn. Close lid for another 5 min. Repeat until the entire corn has been face down, 20 minutes total.

4. Remove from the BBQ and wrap in newspaper. Tuck away in a warm place (I often use the oven or the microwave depending on what else is being used) until the rest of the meal is ready.

5. Just before serving open the newspaper (usually best done back outside) and husk corn. Some kernels may occasionally darken depending on the thickness of the husk, but most of the corn should be bright and delicious! Serve with butter and salt.

Monday, July 12, 2010

A Successful Failure

A Tale of Two Mushrooms

Say what you want about funghi, but most of my friends either love or hate mushrooms. I'm definitely in the former category, if you couldn't tell from earlier blog posts. In the spring I'd been using this Morel Cream sauce quite a bit from the Crampton's Market blog, but unfortunately Morel's have a very short season. They're a very mushroomy mushroom that grows wild just north of here, but can only be harvested in the early spring. Having just gotten a rather nice supply of early season chanterelles though, I wanted to adapt the recipe. Unfortunately, when I started to cook, I realized I had to substitute a rather key ingredient. I'll go into detail below, but what I ended up with was a rather tasty meal, just not at all what I'd planned on!

Original Recipe

15-20 fresh morels, sliced/chopped appropriately
1 large shallot, chopped fine
1 clove garlic, chopped fine or minced
1 tbs butter
2 tbs olive oil
3/4 cup chicken stock
1 cup heavy cream
salt and pepper

1. Heat olive oil in a skillet over medium heat.

2. Add shallots and then garlic, stirring until softened but not brown.

3. Add butter and stir until melted, then add morels. Stir until mushrooms start to brown, about 4 min.

4. Add chicken stock and cook simmering for 2-3 minutes.

5. Add cream and cook on low until reduced and thickened. (This may take time... I've added butter to speed things up as needed, and considered flour and cornstarch too...)

Serve on chicken breasts, toast, steak, etc etc etc...

Screwing it all Up

The original plan was to prepare the same sauce and just substitute the chanterelles for the morels, cook the chicken in the pan before and after the sauce and keep everything else straightforward. Then I started cooking and realized that I didn't have any cream and decided to substitute 1 % milk and extra butter instead. Long story short, I ended up with a very tasty mushroom mixture for my chicken breasts, but it wasn't really a sauce, and it definitely WASN'T creamy! :p Lesson to self - cream is important!

Saturday, July 10, 2010

7 Dozen Cupcakes: Part 3

The third of the three types of cupcakes were Orange Cupcakes, that were originally called for a Vanilla Cream icing. (I'll include the original icing recipe but after trying it on the test batch, we decided it was just too sweet/unbalanced and replaced it with a standard butter cream icing instead.) I've always been a sucker for orange cakes and cupcakes, but in the face of the deep chocolate brownie and cheesecake cupcakes, these were the last of the three kinds to go at school!

Cupcakes

2 eggs
1/2 cup butter, softened
1 cup sugar
1/2 tsp vanilla extract
2 cups cake and pastry flour, sifted BEFORE measured
2 tsp baking powder
1/4 tsp sea salt
1/2 cup milk
1/4 cup orange juice
1 tbsp orange zest

Icing

1/2 cup light cream cheese (about half a package)
2 tbsp butter, softened
2 tsp honey
3/4 tsp vanilla extract
Pinch of sea salt
2 cups icing sugar, sifted BEFORE measured

1. Preheat oven to 375 F.

2. Line 12 muffin cups with paper or silicon liners. Place eggs in a small bowl and cover with hot tap water, setting aside.

3. Using a stand mixer (or your closest equivalent), beat butter with sugar until light and fluffy. Beat in eggs one at a time, then add vanilla.

4. In a large bowl mix sifted flour (MUST be cake/pastry) with baking power and salt, then mix thoroughly - I used a whisk. Then sift or run through a sieve again.

5. Combine milk with orange juice - preferably in the same measuring cup.

6. Stir the flour mixture into the butter mixture, then the milk mixture as well. Stir in zest. Divide evenly between the cups.

7. Bake in oven for 18-20 min or until a cake tester (that's a tooth pick to me) comes out clean. For larger cupcakes I sometimes needed to add 2-3 min, but it's usually about right. Cool on a rack.

***Remember, I switched to a simple butter cream frosting, but here are the instructions for the recipe icing:

8. Beat cream cheese with butter, honey, vanilla, and salt.

9. Gradually add icing sugar until thick enough for spreading.

10. Spread on cooled cupcakes, garnish as desired!

Experimentation: Crimini Salad

We were invited over to visit friends last night, with the instructions to bring both our copy of Settlers of Cataan (always a favourite) and a salad. I wasn't sure what I was going to concoct for the salad - was thinking of anything from edamame, rice, and mustard greens out of the garden to a simple chef salad with homemade dressing - until my wife came home from the library with new cookbooks this week. On the top of the pile was Mireille Guiliano's French Women Don't Get Fat Cookbook, which easily dovetails with the cooking philosophy of this chef. In browsing through it, she found a Crimini Salad recipe that I decided to try. While I did have to make a few changes based on allergies (I'll put the original components in parentheses) the final product was definitely well received and certainly shall be made again!

1 lb crimini mushrooms, wiped clean and sliced a.k.a baby bella mushrooms
2 tbs sherry vinegar
1 tbs lemon juice
4 tbs avocado oil (originally walnut oil - just about any oil should work other than olive)
Sea Salt
Fresh Ground Pepper
2 tbs chopped pecans (originally walnuts)
2 tbs finely chopped parsley
2 tbs chives (yay for herb scissors!)
1/4 cup Parmesan

1. Place the sliced mushrooms in a large bowl.

2. In a small bowl, combine the sherry vinegar, lemon juice and oil, using a whisk to emulsify. An idea would be to add lemon zest here as well. Season to taste with the salt and pepper and then add to the mushrooms, tossing to fully coat everything.

3. Add in the nuts, parsley, chives, and Parmesan and mix or toss to combine.

Thursday, July 8, 2010

7 Dozen Cupcakes: Part 2

The most popular and fastest devoured of all the cupcakes that I made were the Deep Chocolate Brownie Cupcakes. Unfortunately they were also the ones that were the "hardest" to cook. I'll make a note when I get to that part of the recipe, but keep in mind that you're basically cooking mini brownies, with all the tempestuousness that goes into cooking brownies to the perfect moistness at the best of times! As always, these recipes are taken from the Spring 2010 issue of Food & Drink magazine, compliments of the Liquor Control Board of Ontario.

Cupcakes:
4 oz/120 g unsweetened chocolate, broken up (I like Lindt Ecuadorian chocolate bars here)
2/3 cup butter
1 1/2 cups white sugar
4 large eggs
1 tsp vanilla extract (yay homemade!)
1 1/4 cups all purpose flour
1 tsp baking powder
1/2 tsp sea salt
1 cup semi-sweet chocolate chips, chopped
1 cup pecans

Icing:
1 cup semi-sweet chocolate chips, chopped
1/2 cup whipping cream
1 tsp vanilla extract

1. Preheat oven to 350 F. Line 18 muffin cups with paper or silicone cups. Yes, 18! ;)

2. Set a pot filled with 1-2 inches of water on the stove and bring to a boil. Place a "tight fitting" glass or ceramic bowl over top and melt the chocolate and butter together. (Do NOT NOT NOT getting any water in the chocolate or it will scorch!). Still until smooth and remove from heat. One off the heat, stir in the sugar, eggs one at a time, and then the vanilla. Set aside.

3. Using a whisk, mix flour with the baking powder and salt. Stir this dry mix into the chocolate mixture and make sure they are completely incorporated together. Stir in the chocolate chips and the pecans.

4. Divide evenly into cups. According to the recipe, cook 16-18 minutes or just until cupcake center is raised and feels firm to the touch. I don't have an 18 muffin pan, so I've always had to use two 12s together, which drastically changes the cooking time. I've added anywhere from 5-17 extra minutes with different batches, checking them every 3-5 minutes and adjusting from there. Mine has always been at least a little dry still, so I'm still perfecting the cooking time!

5. Let cool on wire racks.

6. Using the bowl in the boiling pot technique again, melt the chocolate chips with the whipping cream while stirring to combine. When almost smooth, remove from the heat and stir in the vanilla. let cool to room temperature.

7. Ice the cupcakes someplace where there can be drips and general gooeyness. Place garnish (I've used both sprinkles and halved pecans) on top. Icing sets in about an hour at room temperature.

Enjoy...while they last!


Tuesday, July 6, 2010

7 Dozen Cupcakes: Part 1

A tradition at the school that I teach in is having different staff members bring snack for everyone on Friday mornings. When I found out that my birthday (shared by another staff member too) was on a Friday, I decided that I was crazy enough to sign up to provide snack for that day. After trying to figure out something that was festive and approachable for a staff our size, I decided to make seven dozen cupcakes. Yes, in retrospect, that IS crazy. But I did three different types in enough multiples to cover everyone. I'm going to post each recipe separately to make this a little more reasonable for typing. All of the recipes were taken from the Spring 2010 issues of Food & Drink magazine, published by the LCBO.

Cheesecake Cupcakes

2 eggs
2.5 oz (1/4 package) lemon social tea biscuits
3 tbsp butter, melted
2 pkgs (250 g each) cream cheese, softened (I use light)
1/2 jam (this will be the flavour of your cheesecake)
1/4 cup sugar
1 tsp vanilla extract (yay for homemade!)
1 cup lemon curd (store bought if homemade is unavailable)
fruit/berries for garnish

1. Preheat oven to 375 F. Line muffin cups with paper or silicone cups - this will make an even dozen cupcakes. Place eggs in a small bowl and cover them with warm/hot water and set aside. Tempering them like this will make them much easier to manage later on.

2. Crush and whirl biscuits in a food processor until they've reduced to fine crumbs. Whirl in melted butter (might needs slightly more, but don't go overboard - muffin cups WILL leak easily) until crumbs are clumpy.

3. Using a spoon, divide the crumb mixture into the muffin cups evenly and pack down. This becomes your bottom crust. Wipe out the food processor.

4. Add cream cheese (cut up coarsely), eggs, jam, sugar, and vanilla to the food processor and combine. I've been using raspberry red currant jam so far, but you could use any jam or other fruit preserve you'd like. The original recipe suggests a "double fruit" jam to increase the flavour. I'm seriously considering using my homemade blueberry maple pecan compote in a future batch...

5. Spoon evenly into the muffin cups, making sure to keep the filling separate from the crumb base. When all of the filling has been distributed and muffin cups have been balanced, tap the entire tin on the counter top 2-3 times to level them.

6. Bake 20 minutes, or until set - some will start to have small cracks visible. I've made four batches now and they've always been done in exactly 20 minutes.

7. Remove from oven and cool on a rack. Cover and refrigerate until chilled.

8. When ready to serve, top each with a dollop of lemon curd and your fruit garnish of choice!

Today's Dinner: Homemade Tacos

The earliest dish that I can remember making entirely on my own, after a childhood of baking and general curiosity in the kitchen, was Old El Paso tacos when I was twelve. I mastered that recipe to the point that I'd bring friends home for lunch from high school (which was about 90 seconds out my front door) and make it for them too. Being a "real" cook now, I was happy when Cook's Illustrated magazine provided me with a recipe to do my own tacos from scratch. What follows is my current scratch taco recipe:

2 tsp vegetable oil (your choice but don't waste olive oil here)
1 small-medium onion, chopped finely
3+ garlic cloves, chopped finely or minced
2 tbs chili powder (regular or ancho)
1 tsp cumin
1-2 tsp coriander
1/2 tsp oregano
1/4 tsp cayenne pepper
1/2 tsp salt (I use sea salt or kosher salt when cooking)
1 lb lean ground beef
1/2 cup tomato sauce (not pasta sauce, actual tomato sauce from the canned tomato aisle)
1/2 chicken broth (see previous blog entry?)
1 tsp brown sugar
2 tsp cider (or other dark) vinegar
Fresh ground black pepper
Small tortilla shells

1. Prep onion and garlic, keeping them separate. If time, combine all the spices in one bowl, and all the liquids in a measuring glass. HINT: Do NOT add the brown sugar to the liquids.
2. Using a large skilled or frying pan, heat the oil until it begins to shimmer.
3. Add the onion and cook until clear and softened, about 4-5 min. If chopped finely, the onion will "disappear" into the final mixture, so this is your chance to hide them in case anyone isn't overly fond of onions. Caramelizing them does not help anything with this recipe.
4. If not already done, combine the chili powder, cumin, coriander, oregano, cayenne, and salt.
5. Add the garlic to the skillet and stir until you can smell it's aroma, about 30 seconds.
6. Add the spice mixture to the skillet and combine until everything is evenly coated and you can smell the spices, about 60 seconds.
7. Add the ground beef, breaking it up with a wooden spoon and working it into the onion/spice mixture. Stir occasionally until beef is no longer pink, about 5-7 minutes.
8. Combine wet ingredients if you haven't already done so. Do NOT add the brown sugar.
9. When the beef has browned, add the brown sugar directly to the skillet and then follow it immediately with the liquids. Stir to combine everything and simmer on medium high heat. The tacos are done when all of the liquid has disappeared and the meat mixture has reduced and thickened. On average, this takes me at least 15-20 minutes, although cooking time can vary widely based on several factors, including your actual quantity of meat.
10. This is a good time to prepare your garnishes, remembering to stir the taco mixture regularly. Garnishes can be rather personal, but I suggest: cheddar cheese, avocado, tomato, salsa, pico de gallo, mushrooms, radish, green onions, lettuce and/or sour cream.
11. If desired, warm tortilla shells as per package directions or simply stack on a microwaveable plate, cover with saran wrap, and nuke for 30-60 seconds.

This should feed 4-6 people.

Leftovers: Warm up your meat mixture and tortillas for more tacos, or use it in my personal favourite, taco salad!

Tonight's Variation: Just to be different, I chopped a Serrano pepper and added it to the onions while they were frying. (Out of deference to the rug rat and his palate, I disposed of the pith and about half of the seeds.) Not sure if I added it too early or if the Serrano just wasn't robust enough to combat the spices, but it added only a minor heat to the mixture and it's flavour wasn't distinguishable except for the odd bite.

Monday, July 5, 2010

Stocking the Freezer

One of the best things that you can make yourself to make your cooking both tastier AND healthier is to prepare your own chicken stock. It's easier to make than any soup, you can control the sodium content (which is a MAJOR concern with anything store bought), and homemade ALWAYS tastes better. We tend to make stock with just about every bird that comes through the kitchen, and dedicate a specific section of the freezer for storage. Even if you forget to take it out of the freezer, about 10 minutes in the microwave will thaw things nicely.

1 Chicken Carcass (with as much skin as survived)
3-4 carrots
3-4 stalks celery
2 onions
3-4 bay leaves
Salt and Pepper
Fresh Thyme (Optional)

1. Combine chicken carcass, vegetables (chopped as finely as possible - see note!), and herbs in a large stock pot and fill with water until the carcass is covered by about an inch of liquid.
2. Bring to a boil.
3. Simmer for 2-3 hours, stirring occasionally. With larger carcasses, 4 hours isn't out of the question.
4. Use a slotted spoon is remove and dispose of all solid contents. (Veggie stock detrius can be composted, but with the carcass involved, chicken stock detrius needs to be thrown out.) Pass the remaining liquid into as many bowls as needed.
5. Cover and refrigerate bowls 1-2 days.
6. Remove bowls and skim fat from surface. Transfer remaining stock into freezer-safe containers and freeze.

THE KEY TO MAKING A TASTY STOCK IS SURFACE AREA! The smaller you can chop your veggies, the more liquid makes contact with them, leeching out the maximum amount of flavour. So the tinier the veggies, the more flavourful the stock!

***If you don't happen to have a leftover chicken carcass handy, just bake 2 lbs of chicken wings (the part of the bird with the most chickeny goodness!) and add them to your pot along with any of the baking juices and "fond" that you can scrape off your pan!

Sunday, July 4, 2010

State of the Garden Address 2010


Hi All!
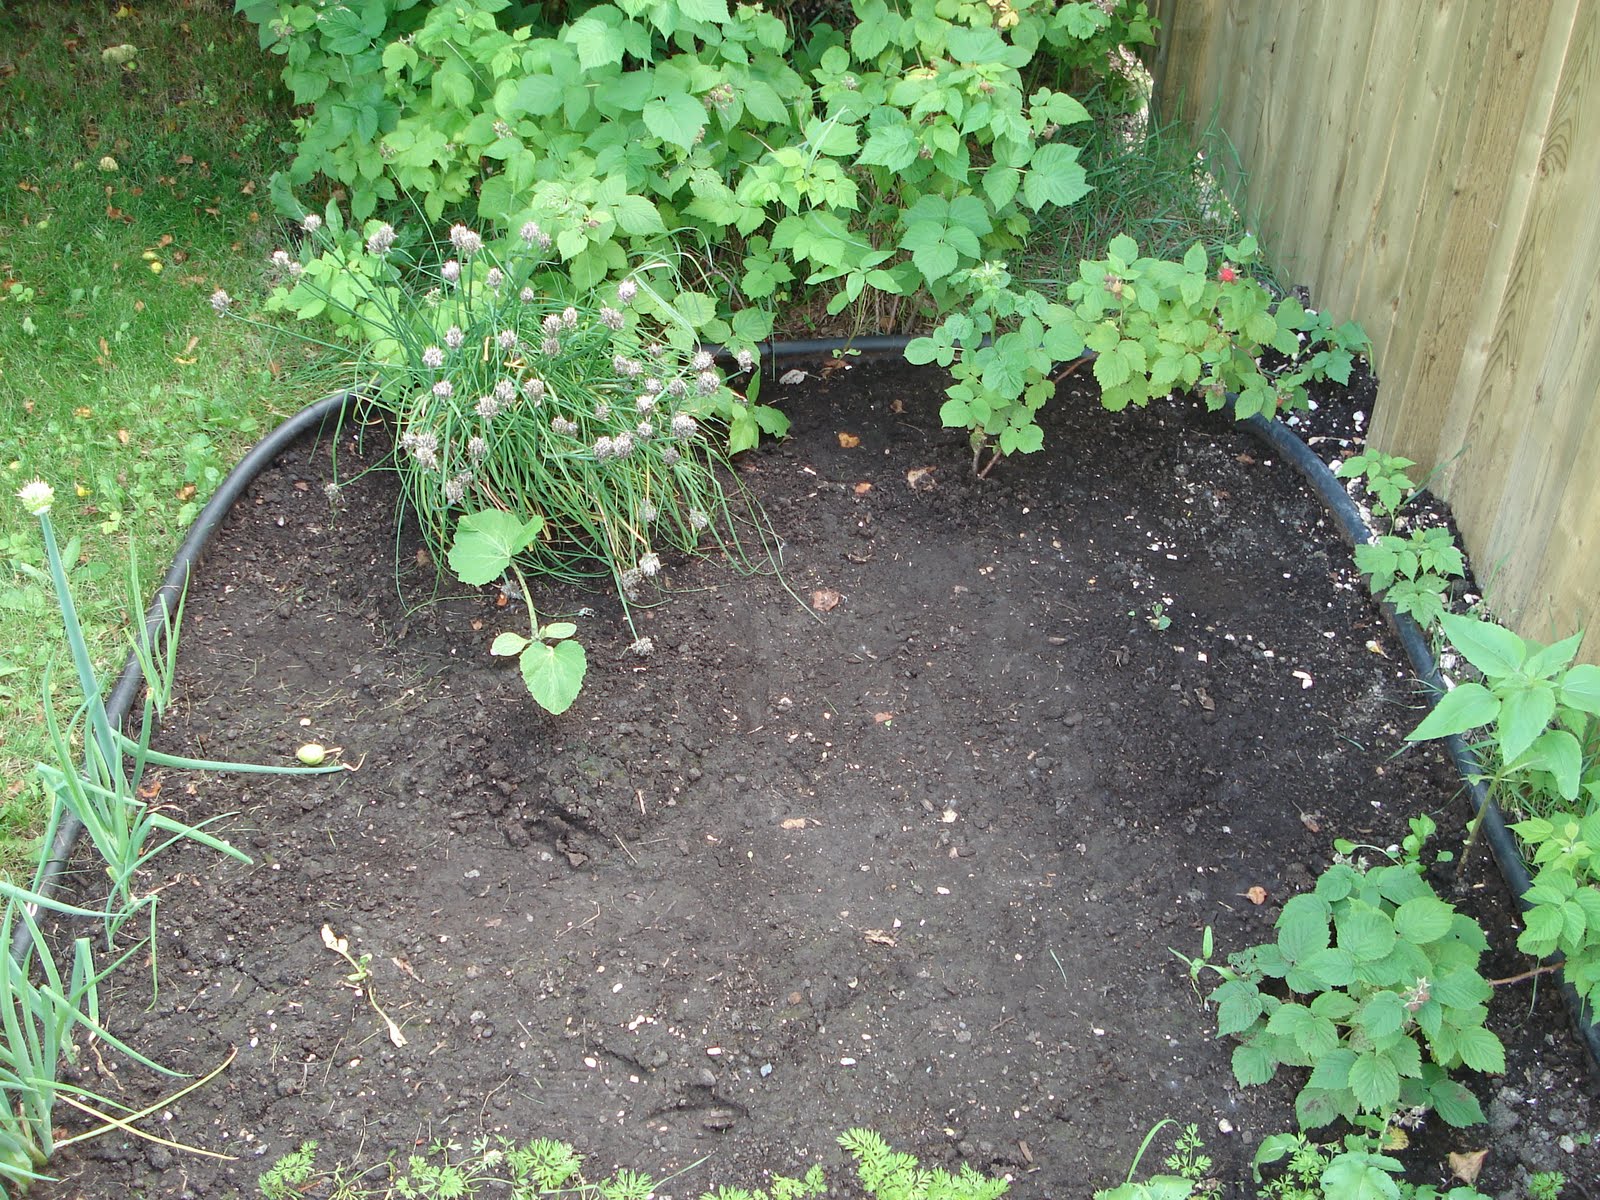
Well, after another long school year summer has begun, and hopefully I can start posting here regularly again. I thought I should start with an overview of how things have been going in my vegetable garden so far this year, since that's what really got this blog started!

Thinks started out well, especially since I got to plant the entire Garden by the end of the May 21st weekend, which, while always the "plan", hasn't actually happened in years and years. The May/June weather hasn't done me any favours, but most of the crops seem to be doing well. As always, I'm having bunny issues, but we'll see what theories and plots we can hatch to drive them off again this year.

Up at the top of the page you'll see a red sunflower shoot, which is one of my experiments this year. There's a few of them along the back edge of the garden against the fence; if they do well this year then I'll probably break down and plant corn next year in the same place. The jungle at the front of the garden is the three tomato plants (lemon plum, bloody butcher, and sun gold), mixed with the apocalypse chives, reseeded red mustard, basil, and dill. I've got green onions along the front of the garden - fresh shoots towards the house and reseeded back towards the apple trees. Otherwise, there's peas, holy moley peppers, green beans, soy beans, bull's blood beets, spinich, more chives, pattypan squash, and mini pumpkins. I've got red and white onions in one planter and regular pickling cukes in another, as well as my tomatillo and a reclaimed lemon drop pepper.

Another experiment is Boston pickling cukes in the garden - they're a heirloom variety I found at an Organic market. One of the three shoots is already gone, and a second is in the process of dying, but the third has bloomed already! :)

Sunday, October 4, 2009

Canning: Pickled Beets

Well, canning season seems to have continued into the fall, despite school starting! I still have a second batch of blueberry maple pecan compote to mix up, but after a bonanza at the last day of Crampton's Market, I've got lemons to preserve and I ended up with a large batch of baby beets to pickle! Now, like most of the things I pickle other than the traditional dills, I know that pickled beets are an acquired taste. So acquired, in fact, that I'm not sure that I even like them. But, being that I have a wife who's been salivating over the possibility of pickled beets since we started canning lo those four years ago, it was time to try.

Ultimately, they were really easy - you have to pay attention to a lot of things, including spending twice as much effort trying not to make a mess as normal since beets stain so badly, but it was an easy solo canning adventure. The beets took forever to boil, but once they were tender their skins came off easily after I drained them and refilled the pot with cold water. The brine was easy enough to mix up - the similarities to my dill pickle brine were too obvious to miss. I will say that the one thing I had to do this time for ALL four jars, that I rarely have to do otherwise is clear air bubbles. Most liquid canning solutions call for your "non-metallic" tool to swish around the jar, and I usually do, but I've never seen so many air bubbles as today. Luckily that's easy to clear up though, and then it was just a matter of boiling the jars!

Now we'll just have to wait and see what they taste like... And what my wife considers appropriate repayment!

Wednesday, September 30, 2009

Road Grill: Crab Salad Stuffed Avacados

We were watching Road Grill with Matt Dunnigan of all things over the summer and came across this fairly easy recipe for a light, cool meal.

1. Drain and rinse a can of crab meat, making sure to check for shells.
2. Add a decent sized dollop or two of Miracle Whip or Mayonnaise.
3. Zest a lime directly into the crab. Reserve some juice to brush the avocados then juice the rest into the crab mixture as well.
4. Add a generous amount of your favourite hot sauce.
5. Season with salt and pepper.
6. Mix and adjust to taste as necessary.
7. Slice, skin, and de-stone two avocados so you end up with 4 half avocados. Brush with reserved lime juice. Any remaining lime juice can go into the crab mixture.
8. Spoon crab mixture onto avocados.
9. Top each avocado with green onion or chives.

And voila!

Monday, September 28, 2009

Sun Dried Tomatoes

The Italians have lied to us for years! For that matter, most of the Mediterranean nations have been stretching the truth to us "westerners!" There is no such thing as sun dried tomatoes! There are dried tomatoes, and they have a sweet, concentrated tomato flavour, but there's no "sun" involved, that's just a flowery name for them.

Nope, sun dried tomatoes are dried in the oven. Any tomatoes will work, although I find cherry and grape style tomatoes work the best. Simply wash and dry tomatoes, then slice them all in half and combine them carefully in a medium/large mixing bowl. Drizzle them generously with olive oil and add salt and pepper. Use your hands to mix them gently. Take a cookie sheet/baking tray and arrange the tomatoes skin side down so none are touching. (If you're wondering if you need to grease the tray, you need to go back and add more oil to the tomatoes!) Then put the tray in the oven or toaster oven at the lowest possible setting for several hours, preferably overnight!

When they come out of the oven, the tomatoes will have shrunk, concentrated, and become tiny morsels of goodness! Just make sure they go straight in the fridge for maximum shelf life!

A Gardener's Nemesis

If there's a sure way to rain on a gardener's parade in the mid to late fall, it's the arrival of his/her nemesis Jack Frost. After having such an unbelievable September and finally having things GROW in the garden, I was really hoping that our first frost would be delayed according. Unfortunately, the day after I start cleaning out the garden it's forecasted. Well, my tomatoes are stripped and my pumpkin is covered....everything else is just going to have to withstand Jack's touch. I guess this means I can pick the turnips now...

Although, another several dozen green tomatoes after several dozen ripe tomatoes yesterday? What's a chef to do? "Sun" drying!

Sunday, September 27, 2009

Change Of Season

Almost hard to believe that it's time to think about autumn chores around the garden. Sure, school started almost a month(?!!) ago now, but things are still growing and we're just finally ending our summertime temperatures...which hadn't even started until Labour Day! Made it very hard to accept today when I realized that I should be planting next year's garlic in the next 2-3 weeks!

Anyways, things I did today to facilitate the changing of the seasons...
-dug the last of the garlic and all of the red and spanish onions, setting them up to dry in the garage for at least a week
-harvested the last of the Juliet tomatoes and all of the ripe Snow White and Sungold tomatoes; still lots of flowers and green ripening fruit on the latter two plants, so we may get a few more yet depending on the weather...
-brought the Tomatillo into the house - maybe I can get some actually fruit off of it now that it won't go below 50 F at night!

And with the tomatillo came some indoor gardening chores...
-adding soil to the former pepper pot and planting my next indoor fruiting olive tree :)
-redoing my aloe vera pot and replanting all of the plants that were trying to escape
-getting the tomatillo established indoors
-reawakening the Amyrillis

Oh well, at least colder temperatures mean I get to dust off my chili recipes... ;)

Friday, August 21, 2009

Daily Dinner Review - Fried Chicken, Corn on the Cob, and Tomato "Salad"

We had two of our more food aware friends over for dinner tonight, so I wanted to put together a meal that was both representative of my cooking, easy-ish to prepare, and was fitting for a summer evening. Of course, average summer evenings this year are cold, rainy, and gloomy, but we'll ignore that for now.

I started out with my fried chicken, which besides my family spaghetti sauce, is probably the dish that I've most amalgamated and personalized in the past few years. The roots for my friend chicken started out with Michael Smith and Tyler Florence, but have now seriously melded with Big Daddy Aaron McCargo Jr. Ultimately I'm doing a Maryland style fried chicken now - I rub the chicken with my spices and let it sit before flouring, unlike more Southern styles that require a buttermilk soak and only add spices to the flour. My spice choices are a little fluid, although the currently revolve around paprika, cayenne pepper, FRESH ground black pepper (very important), kosher salt, and garlic and onion powers. I'm tempted to try either white pepper (good heat, but minimal flavour) or something green in the future though. The current combination provides good flavour and just the right amount of zing/heat in your mouth though, so there's no drive to change things up too much. I also added a quick bake for the chicken for after they've fried in the stove top oil - things ended up a touch dry tonight, but the baking helped with the crispiness of the coating and got rid of some of the oily issues we had last time.

Corn on the Cob is probably the simplest BBQ dish to make. Soak your corn for 20 min, and then throw it (husk and all) onto the grill, rotating for 20 minutes. If you're still cooking other things, wrap it in newspaper and throw it in the microwave or oven until just before you're ready to eat. The corn comes out with a great flavor, good sweetness, and rarely has any char marks. All you need to do is add butter and salt! Now if only I could figure out that lime butter recipe...

One of the easiest and tastiest "salads" I can make is a true Italiano treat - repeating layers of fresh sliced tomato, boccochini (mozzarella balls), and basil, then doused with balsamic vinegar over top. It's a quintessential summer time food - both light and flavourful, and very much a reminder of a hot summer's day. It works just as well in the middle of the winter if you can find the right tomatoes too!

Overall, a good variety of flavours and a balanced meal in terms of different types of dishes too!

Thursday, August 20, 2009

Planning Canning

Well, it's already mid- (err...late?) August, and it seems like canning should be winding down for the summer, except that thanks to our unseasonal temperature and mass deluges of rain, it hasn't even really begun yet. Pickling cucumbers are still on the vine, and most of the July and August produce is still waiting to be harvested, never mind the fall arrivals. At this point, we'll be getting fresh veggies and fruit well into October baring any early frosts.

Dill pickles are always the centerpiece of my canning season and seem to be the most popular of my creations. While not overly labor intensive they do take forever, thanks to the need to maintain the hot water bath in a specific temperature range to guarantee preservation but at the same time maintaining the crunchiness of the pickles. Last year I ended up doing 36 pounds of pickles in one day (1 lb = 1 jar) but I'm thinking of splitting t hings into 2 or 3 days this year, depending on when orders are available...and whether or not school starts first!

Wasn't sure what to do about other canning this year, especially as neither of our apple trees are going to bear fruit this year thanks to the canker worms in the spring. We're well stocked on both "regular" apple chutney and Kashmir chutney, and there definitely isn't a demand for apple butter this year, so I think we can skip the apples altogether. Thanks to the desires of my SIL, we're also still well stocked with triple citrus marmalade as well. Most other things can be replenished or added to though.

I wasn't sure where I was going to find my recipes or inspiration from this year, when I stumbled across a book called "Put a Lid on It!" at the checkout stand at the library. I figured I'd take it home and copy any recipes that looked interesting and see it that would kick start my canning plans. After the first time I went through the book, I had over 40 recipes marked...so I ended up ordering the book, as well as it's sequel. Lots in there to go through, and I'm sure I'll find some things to make...possible even raspberry chambord jam!

More canning planning to come as I narrow down my choices...and decide what do to about our dwindling stock of pickled onions!

Saturday, August 15, 2009

Tools of the Trade: My Stock Pot

I talked in my culinary point of view about believing in "simple" to prepare dishes that could be made in any kitchen with a common set of tools and devices. While my own kitchen definitely has quite a few more than the mandatory minimum, I thought that I should talk about some of the toys in my kitchen.

Something that I think SHOULD be a requirement in any kitchen, but isn't officially is a stock pot. While stock pots come in different sizes, it should be at least twice the size of a dutch oven to be effective. My personal stock pot is a 16 qt All Clad with an aluminum bottom that fits rather nicely on the adjustable burner of my glass top range.

The nicest thing about a stock pot is that you don't have to worry about how much you put in it (within reason!). I can a multi-batch of pasta sauce or make stock out of the remains of a 8 lbs chicken roast and never come close to filling the pot. Mind you I did manage to fill it up with a multi-batch of Kashmir chutney last summer, but the less said about that the better!

Anyways, on the list of funnest toys to play with in the kitchen, my stock pot ends up #3!

Thursday, August 13, 2009

Condiments

While I know making your own condiments sounds a little extreme for the average cook, it's actually a great way of increasing flavour in your dishes, and cutting down on the number of preservatives you consume. So are easier to prepare than others, but there's always a recipe if you look hard enough to find it.

Previous experimenting has lead to failure with ketchup due to a completely different flavour than advertised (luckily my stepson loved it), and a mediocre mustard that just kind of was, without being all that exciting. Relish is probably the most common condiment prepared in homes, but I'm not sure that making 8 L at once was the best idea in the world...especially when we only really use it on hamburgers! :p

BBQ Sauce, on the other hand, was my biggest success. A nice bold flavour and a chunky thickness made the process worth it. I tried it again today, and things went quite a bit smoother. I used an extra large can of whole plum tomatoes, which worked much better than a couple jars of homemade canned tomatoes...that needed lots of crushed tomatoes added to thicken them up. I was short an onion, which should add some extra depth next time, but I don't really miss it from the finished sauce. The standard ingredients are the same - home grown garlic, soy sauce, Worcester, olive oil, brown sugar, ginger, and spices (just no vinegar, otherwise you end up with sweet and sour sauce!). Tried to add a new "secret ingredient", in this case coriander, but it didn't add too much to the final sauce. I think I either have to increase the amount or pick something different next time. This is a blend while hot recipe too, which always makes me glad I have my immersion blender!