Saturday, July 10, 2010

7 Dozen Cupcakes: Part 3

The third of the three types of cupcakes were Orange Cupcakes, that were originally called for a Vanilla Cream icing. (I'll include the original icing recipe but after trying it on the test batch, we decided it was just too sweet/unbalanced and replaced it with a standard butter cream icing instead.) I've always been a sucker for orange cakes and cupcakes, but in the face of the deep chocolate brownie and cheesecake cupcakes, these were the last of the three kinds to go at school!

Cupcakes

2 eggs
1/2 cup butter, softened
1 cup sugar
1/2 tsp vanilla extract
2 cups cake and pastry flour, sifted BEFORE measured
2 tsp baking powder
1/4 tsp sea salt
1/2 cup milk
1/4 cup orange juice
1 tbsp orange zest

Icing

1/2 cup light cream cheese (about half a package)
2 tbsp butter, softened
2 tsp honey
3/4 tsp vanilla extract
Pinch of sea salt
2 cups icing sugar, sifted BEFORE measured

1. Preheat oven to 375 F.

2. Line 12 muffin cups with paper or silicon liners. Place eggs in a small bowl and cover with hot tap water, setting aside.

3. Using a stand mixer (or your closest equivalent), beat butter with sugar until light and fluffy. Beat in eggs one at a time, then add vanilla.

4. In a large bowl mix sifted flour (MUST be cake/pastry) with baking power and salt, then mix thoroughly - I used a whisk. Then sift or run through a sieve again.

5. Combine milk with orange juice - preferably in the same measuring cup.

6. Stir the flour mixture into the butter mixture, then the milk mixture as well. Stir in zest. Divide evenly between the cups.

7. Bake in oven for 18-20 min or until a cake tester (that's a tooth pick to me) comes out clean. For larger cupcakes I sometimes needed to add 2-3 min, but it's usually about right. Cool on a rack.

***Remember, I switched to a simple butter cream frosting, but here are the instructions for the recipe icing:

8. Beat cream cheese with butter, honey, vanilla, and salt.

9. Gradually add icing sugar until thick enough for spreading.

10. Spread on cooled cupcakes, garnish as desired!

Experimentation: Crimini Salad

We were invited over to visit friends last night, with the instructions to bring both our copy of Settlers of Cataan (always a favourite) and a salad. I wasn't sure what I was going to concoct for the salad - was thinking of anything from edamame, rice, and mustard greens out of the garden to a simple chef salad with homemade dressing - until my wife came home from the library with new cookbooks this week. On the top of the pile was Mireille Guiliano's French Women Don't Get Fat Cookbook, which easily dovetails with the cooking philosophy of this chef. In browsing through it, she found a Crimini Salad recipe that I decided to try. While I did have to make a few changes based on allergies (I'll put the original components in parentheses) the final product was definitely well received and certainly shall be made again!

1 lb crimini mushrooms, wiped clean and sliced a.k.a baby bella mushrooms
2 tbs sherry vinegar
1 tbs lemon juice
4 tbs avocado oil (originally walnut oil - just about any oil should work other than olive)
Sea Salt
Fresh Ground Pepper
2 tbs chopped pecans (originally walnuts)
2 tbs finely chopped parsley
2 tbs chives (yay for herb scissors!)
1/4 cup Parmesan

1. Place the sliced mushrooms in a large bowl.

2. In a small bowl, combine the sherry vinegar, lemon juice and oil, using a whisk to emulsify. An idea would be to add lemon zest here as well. Season to taste with the salt and pepper and then add to the mushrooms, tossing to fully coat everything.

3. Add in the nuts, parsley, chives, and Parmesan and mix or toss to combine.

Thursday, July 8, 2010

7 Dozen Cupcakes: Part 2

The most popular and fastest devoured of all the cupcakes that I made were the Deep Chocolate Brownie Cupcakes. Unfortunately they were also the ones that were the "hardest" to cook. I'll make a note when I get to that part of the recipe, but keep in mind that you're basically cooking mini brownies, with all the tempestuousness that goes into cooking brownies to the perfect moistness at the best of times! As always, these recipes are taken from the Spring 2010 issue of Food & Drink magazine, compliments of the Liquor Control Board of Ontario.

Cupcakes:
4 oz/120 g unsweetened chocolate, broken up (I like Lindt Ecuadorian chocolate bars here)
2/3 cup butter
1 1/2 cups white sugar
4 large eggs
1 tsp vanilla extract (yay homemade!)
1 1/4 cups all purpose flour
1 tsp baking powder
1/2 tsp sea salt
1 cup semi-sweet chocolate chips, chopped
1 cup pecans

Icing:
1 cup semi-sweet chocolate chips, chopped
1/2 cup whipping cream
1 tsp vanilla extract

1. Preheat oven to 350 F. Line 18 muffin cups with paper or silicone cups. Yes, 18! ;)

2. Set a pot filled with 1-2 inches of water on the stove and bring to a boil. Place a "tight fitting" glass or ceramic bowl over top and melt the chocolate and butter together. (Do NOT NOT NOT getting any water in the chocolate or it will scorch!). Still until smooth and remove from heat. One off the heat, stir in the sugar, eggs one at a time, and then the vanilla. Set aside.

3. Using a whisk, mix flour with the baking powder and salt. Stir this dry mix into the chocolate mixture and make sure they are completely incorporated together. Stir in the chocolate chips and the pecans.

4. Divide evenly into cups. According to the recipe, cook 16-18 minutes or just until cupcake center is raised and feels firm to the touch. I don't have an 18 muffin pan, so I've always had to use two 12s together, which drastically changes the cooking time. I've added anywhere from 5-17 extra minutes with different batches, checking them every 3-5 minutes and adjusting from there. Mine has always been at least a little dry still, so I'm still perfecting the cooking time!

5. Let cool on wire racks.

6. Using the bowl in the boiling pot technique again, melt the chocolate chips with the whipping cream while stirring to combine. When almost smooth, remove from the heat and stir in the vanilla. let cool to room temperature.

7. Ice the cupcakes someplace where there can be drips and general gooeyness. Place garnish (I've used both sprinkles and halved pecans) on top. Icing sets in about an hour at room temperature.

Enjoy...while they last!


Tuesday, July 6, 2010

7 Dozen Cupcakes: Part 1

A tradition at the school that I teach in is having different staff members bring snack for everyone on Friday mornings. When I found out that my birthday (shared by another staff member too) was on a Friday, I decided that I was crazy enough to sign up to provide snack for that day. After trying to figure out something that was festive and approachable for a staff our size, I decided to make seven dozen cupcakes. Yes, in retrospect, that IS crazy. But I did three different types in enough multiples to cover everyone. I'm going to post each recipe separately to make this a little more reasonable for typing. All of the recipes were taken from the Spring 2010 issues of Food & Drink magazine, published by the LCBO.

Cheesecake Cupcakes

2 eggs
2.5 oz (1/4 package) lemon social tea biscuits
3 tbsp butter, melted
2 pkgs (250 g each) cream cheese, softened (I use light)
1/2 jam (this will be the flavour of your cheesecake)
1/4 cup sugar
1 tsp vanilla extract (yay for homemade!)
1 cup lemon curd (store bought if homemade is unavailable)
fruit/berries for garnish

1. Preheat oven to 375 F. Line muffin cups with paper or silicone cups - this will make an even dozen cupcakes. Place eggs in a small bowl and cover them with warm/hot water and set aside. Tempering them like this will make them much easier to manage later on.

2. Crush and whirl biscuits in a food processor until they've reduced to fine crumbs. Whirl in melted butter (might needs slightly more, but don't go overboard - muffin cups WILL leak easily) until crumbs are clumpy.

3. Using a spoon, divide the crumb mixture into the muffin cups evenly and pack down. This becomes your bottom crust. Wipe out the food processor.

4. Add cream cheese (cut up coarsely), eggs, jam, sugar, and vanilla to the food processor and combine. I've been using raspberry red currant jam so far, but you could use any jam or other fruit preserve you'd like. The original recipe suggests a "double fruit" jam to increase the flavour. I'm seriously considering using my homemade blueberry maple pecan compote in a future batch...

5. Spoon evenly into the muffin cups, making sure to keep the filling separate from the crumb base. When all of the filling has been distributed and muffin cups have been balanced, tap the entire tin on the counter top 2-3 times to level them.

6. Bake 20 minutes, or until set - some will start to have small cracks visible. I've made four batches now and they've always been done in exactly 20 minutes.

7. Remove from oven and cool on a rack. Cover and refrigerate until chilled.

8. When ready to serve, top each with a dollop of lemon curd and your fruit garnish of choice!

Today's Dinner: Homemade Tacos

The earliest dish that I can remember making entirely on my own, after a childhood of baking and general curiosity in the kitchen, was Old El Paso tacos when I was twelve. I mastered that recipe to the point that I'd bring friends home for lunch from high school (which was about 90 seconds out my front door) and make it for them too. Being a "real" cook now, I was happy when Cook's Illustrated magazine provided me with a recipe to do my own tacos from scratch. What follows is my current scratch taco recipe:

2 tsp vegetable oil (your choice but don't waste olive oil here)
1 small-medium onion, chopped finely
3+ garlic cloves, chopped finely or minced
2 tbs chili powder (regular or ancho)
1 tsp cumin
1-2 tsp coriander
1/2 tsp oregano
1/4 tsp cayenne pepper
1/2 tsp salt (I use sea salt or kosher salt when cooking)
1 lb lean ground beef
1/2 cup tomato sauce (not pasta sauce, actual tomato sauce from the canned tomato aisle)
1/2 chicken broth (see previous blog entry?)
1 tsp brown sugar
2 tsp cider (or other dark) vinegar
Fresh ground black pepper
Small tortilla shells

1. Prep onion and garlic, keeping them separate. If time, combine all the spices in one bowl, and all the liquids in a measuring glass. HINT: Do NOT add the brown sugar to the liquids.
2. Using a large skilled or frying pan, heat the oil until it begins to shimmer.
3. Add the onion and cook until clear and softened, about 4-5 min. If chopped finely, the onion will "disappear" into the final mixture, so this is your chance to hide them in case anyone isn't overly fond of onions. Caramelizing them does not help anything with this recipe.
4. If not already done, combine the chili powder, cumin, coriander, oregano, cayenne, and salt.
5. Add the garlic to the skillet and stir until you can smell it's aroma, about 30 seconds.
6. Add the spice mixture to the skillet and combine until everything is evenly coated and you can smell the spices, about 60 seconds.
7. Add the ground beef, breaking it up with a wooden spoon and working it into the onion/spice mixture. Stir occasionally until beef is no longer pink, about 5-7 minutes.
8. Combine wet ingredients if you haven't already done so. Do NOT add the brown sugar.
9. When the beef has browned, add the brown sugar directly to the skillet and then follow it immediately with the liquids. Stir to combine everything and simmer on medium high heat. The tacos are done when all of the liquid has disappeared and the meat mixture has reduced and thickened. On average, this takes me at least 15-20 minutes, although cooking time can vary widely based on several factors, including your actual quantity of meat.
10. This is a good time to prepare your garnishes, remembering to stir the taco mixture regularly. Garnishes can be rather personal, but I suggest: cheddar cheese, avocado, tomato, salsa, pico de gallo, mushrooms, radish, green onions, lettuce and/or sour cream.
11. If desired, warm tortilla shells as per package directions or simply stack on a microwaveable plate, cover with saran wrap, and nuke for 30-60 seconds.

This should feed 4-6 people.

Leftovers: Warm up your meat mixture and tortillas for more tacos, or use it in my personal favourite, taco salad!

Tonight's Variation: Just to be different, I chopped a Serrano pepper and added it to the onions while they were frying. (Out of deference to the rug rat and his palate, I disposed of the pith and about half of the seeds.) Not sure if I added it too early or if the Serrano just wasn't robust enough to combat the spices, but it added only a minor heat to the mixture and it's flavour wasn't distinguishable except for the odd bite.

Monday, July 5, 2010

Stocking the Freezer

One of the best things that you can make yourself to make your cooking both tastier AND healthier is to prepare your own chicken stock. It's easier to make than any soup, you can control the sodium content (which is a MAJOR concern with anything store bought), and homemade ALWAYS tastes better. We tend to make stock with just about every bird that comes through the kitchen, and dedicate a specific section of the freezer for storage. Even if you forget to take it out of the freezer, about 10 minutes in the microwave will thaw things nicely.

1 Chicken Carcass (with as much skin as survived)
3-4 carrots
3-4 stalks celery
2 onions
3-4 bay leaves
Salt and Pepper
Fresh Thyme (Optional)

1. Combine chicken carcass, vegetables (chopped as finely as possible - see note!), and herbs in a large stock pot and fill with water until the carcass is covered by about an inch of liquid.
2. Bring to a boil.
3. Simmer for 2-3 hours, stirring occasionally. With larger carcasses, 4 hours isn't out of the question.
4. Use a slotted spoon is remove and dispose of all solid contents. (Veggie stock detrius can be composted, but with the carcass involved, chicken stock detrius needs to be thrown out.) Pass the remaining liquid into as many bowls as needed.
5. Cover and refrigerate bowls 1-2 days.
6. Remove bowls and skim fat from surface. Transfer remaining stock into freezer-safe containers and freeze.

THE KEY TO MAKING A TASTY STOCK IS SURFACE AREA! The smaller you can chop your veggies, the more liquid makes contact with them, leeching out the maximum amount of flavour. So the tinier the veggies, the more flavourful the stock!

***If you don't happen to have a leftover chicken carcass handy, just bake 2 lbs of chicken wings (the part of the bird with the most chickeny goodness!) and add them to your pot along with any of the baking juices and "fond" that you can scrape off your pan!

Sunday, July 4, 2010

State of the Garden Address 2010


Hi All!
Well, after another long school year summer has begun, and hopefully I can start posting here regularly again. I thought I should start with an overview of how things have been going in my vegetable garden so far this year, since that's what really got this blog started!

Thinks started out well, especially since I got to plant the entire Garden by the end of the May 21st weekend, which, while always the "plan", hasn't actually happened in years and years. The May/June weather hasn't done me any favours, but most of the crops seem to be doing well. As always, I'm having bunny issues, but we'll see what theories and plots we can hatch to drive them off again this year.

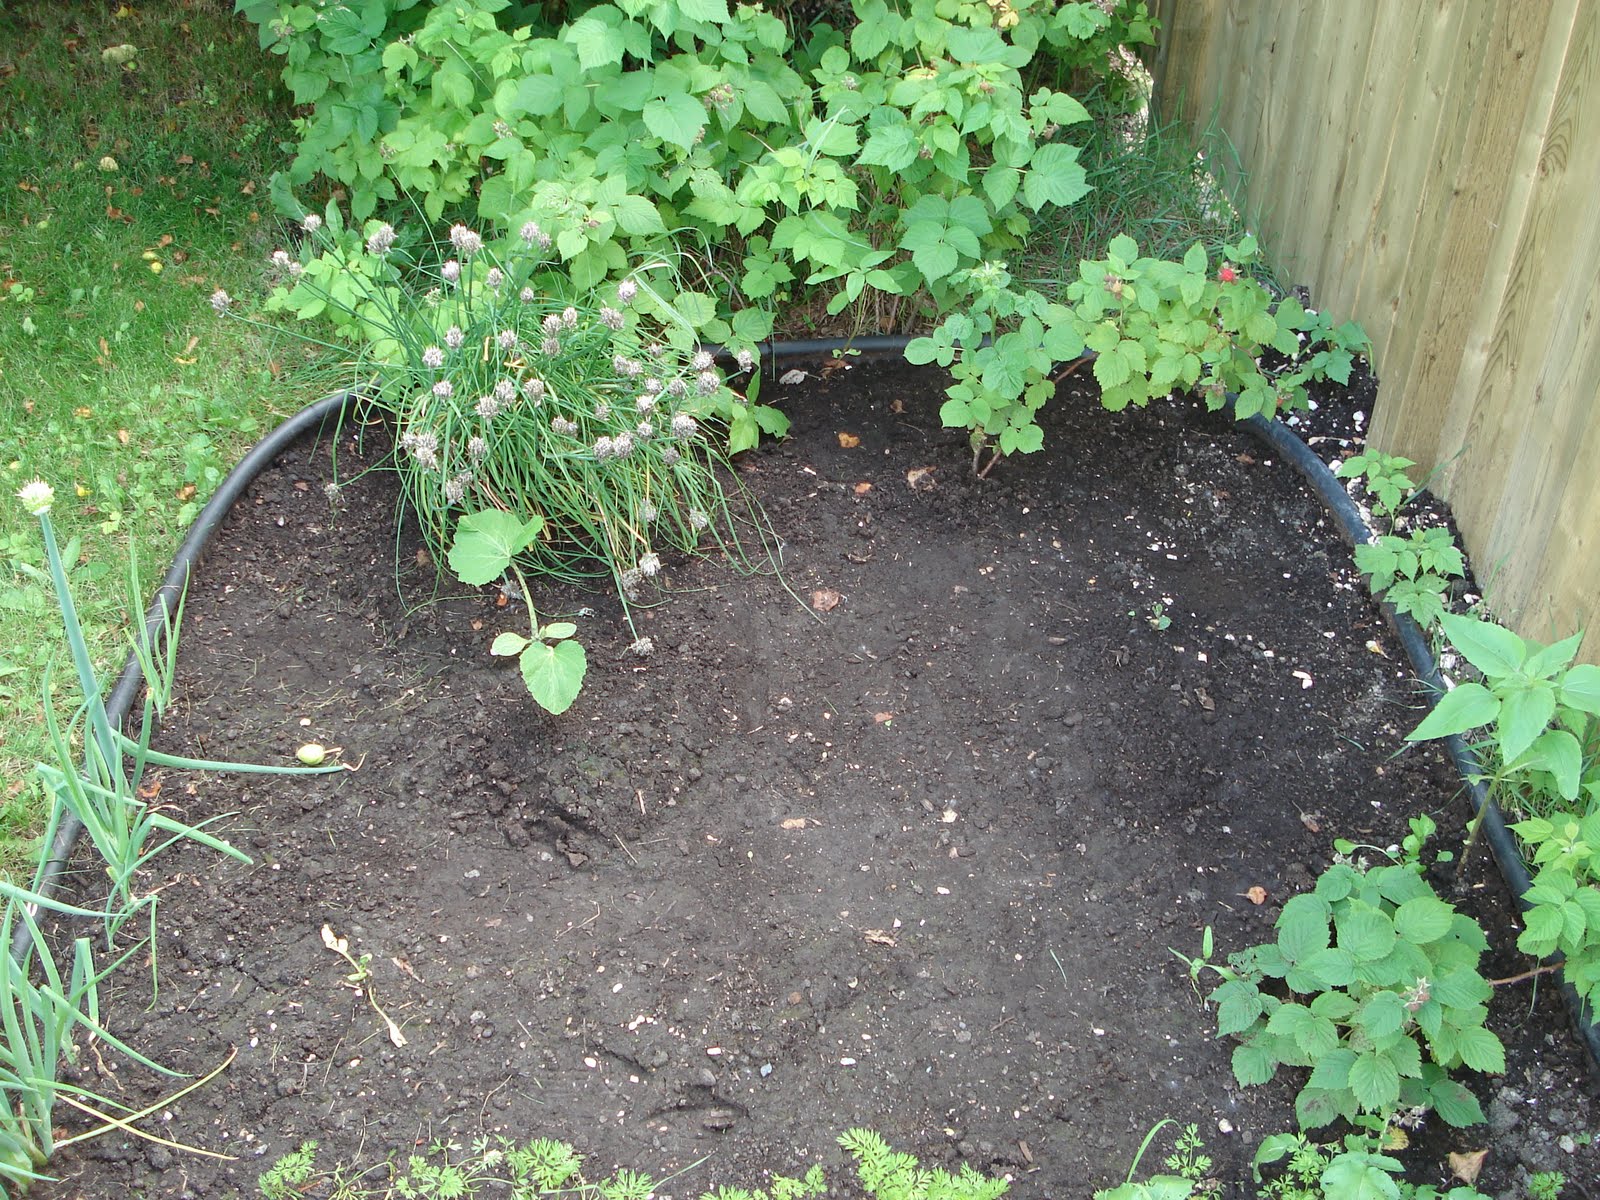
Up at the top of the page you'll see a red sunflower shoot, which is one of my experiments this year. There's a few of them along the back edge of the garden against the fence; if they do well this year then I'll probably break down and plant corn next year in the same place. The jungle at the front of the garden is the three tomato plants (lemon plum, bloody butcher, and sun gold), mixed with the apocalypse chives, reseeded red mustard, basil, and dill. I've got green onions along the front of the garden - fresh shoots towards the house and reseeded back towards the apple trees. Otherwise, there's peas, holy moley peppers, green beans, soy beans, bull's blood beets, spinich, more chives, pattypan squash, and mini pumpkins. I've got red and white onions in one planter and regular pickling cukes in another, as well as my tomatillo and a reclaimed lemon drop pepper.

Another experiment is Boston pickling cukes in the garden - they're a heirloom variety I found at an Organic market. One of the three shoots is already gone, and a second is in the process of dying, but the third has bloomed already! :)